Helmets 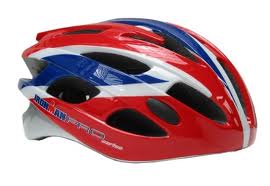
A helmet, when
fitted correctly, can reduce the risk of head/brain injury by up to 85 percent.
A helmet not worn correctly does not provide enough protection. By law, you
must wear an approved bicycle helmet while on a bicycle or scooter in NSW- not
only on the road, cycling paths and skate parks, but all public places.
Approved
helmets are marked with an Australian Standard Approved notification.
The Australian Road Rules clearly demand that a bicycle helmet must meet the
Australian / New Zealand Standards. The AS/NZ 2063 Standard does not recognise
any other standard helmet from any other country. Accordingly, only helmets
that meet and carry the AS/NZ Standards approval are permitted for use on
Australian roads - including road races conducted under the auspices of Cycling
Australia and its affiliates. Helmets
only work once - The helmet
should be replaced if:
- It's been dropped onto a
hard surface or involved in an accident.
- You see any cracks in the
foam.
- The straps look worn or
frayed.
 ---"KEEP YOUR BIKE RUNNING WITH A RAG AND WATER" ---"KEEP YOUR BIKE RUNNING WITH A RAG AND WATER"
Cleaning your bike is an excellent way to get to know how the gear
on your bike works .. or why it doesn't! By cleaning each individual spoke you
will discover if any
have come loose, by wiping down your frame you may find
cracks or dis that need attention, and digging out the mud or glued in grease
from between your rear cogs will
definitely improve the shifting of your
chain.
To clean use Citrus degreaser in a small dish : BBB scrubbing brush : large
spray bottle full of clean water : 2 x clean dry rags : old butter knife or flat
screwdriver : BBB chain cleaner full of degreaser.
Stand bike over towel in a wheel stand or workstand, clean chain
with chain cleaner and wipe with rag ... repeat if needed. Scrub complete bike
with degreaser, working
it well into the derailleurs and cogs, avoiding hub
seals. Spray down bike with water spray bottle to remove all degreaser and
residue .... avoiding spraying water into hub
seals
from side. Use the knife or screwdriver to pick out crud from cogs
and jockey wheels. Dry immediately with clean rag .... use dirtier rag
for greasy parts and a cleaner one on the frame. Voila!
Remember to re-lube chain once dry. Creaking Cranks At some point you may have experienced a
noise or 'creak' while pedalling under load. Generally this noise will be most
audible when the crank is in the forward or 2 o'clock position when you're
pedalling out of the saddle. Once isolated it should be serviced. The most
common cause of the creaking noise is due to water finding its way between the
aluminium crank shaft and the tappered cromoly axle and a gradual build up of
corrosion occurs. On assembly the axle should receive a light smear of grease
and this is washed away over time by water when the bike is washed or used in
wet weather. To remedy the problem the cranks must be removed, axle and crank
shaft cleaned and lightly greased then reassembled. If a noise is still audible
inspect the following areas.
* Pedal
threads are greased and tight
* Bottom
Bracket unit threads are greased and tight
* Chain-ring
bolts are tight
Here are few misconceptions
in the world of bike maintenance
e
-
MY CHAIN IS BROKEN, SO I NEED A NEW ONE
: If your chain breaks it could be for a few
reasons. Case 1:It may have had a faulty connecting link,
so have agood
look at the break before you throw that chain away. One damaged link can be
removed and the chain re-joined. Case 2: If the chain has a twist due to
getting jammed, this also can be removed and the chain re-joined or if you have
a couple of sets of multi-grips you can usually untwist the link. Case 3:
It's broken because of pure old age and/or wear. If you know this is the case
then just fitting a new chain won't get you where you want to go. Chains and
rear cogs wear together and in most scenarios you will need to fit a new set of
rear cogs along with that new chain.
-
SO MY CHAIN IS STRETCHED......CAN'T I JUST
REMOVE A COUPLE OF LINKS?: I hear this all the time. A bike chain is joined by a few dozen
rivets that hold the outer plates of the chain together. These plates are where
the problem is. The metal that surrounds each rivet gradually stretches over
time, thus
resulting in an overall increase in length of your chain. Removing a
couple of links will do bugger all. Time for a new chain and
cogs!
-
WHY CAN'T I USE WD40 SPRAY TO LUBRICATE MY
CHAIN?: WD40 or similar spray products are NOT a
lubricant. They are used to free up
corroded joints, like rusty nuts, and they
act more like a degreaser than a lubricant. Spray rusty chains to get them
moving but you will have to wash it down
and lubricate it afterwards with a good
oil or dry lube.
-
TYRE & TUBE SIZES
: You
don't have to be so precise when it comes to tube sizes. Just use this rule of
thumb....you can generally fit a tube that is one or
two width sizes smaller
intoa larger tyre ut you'll have difficulty squeezing a larger tube into a
smaller tyre. Width is the x1.5, x1.75, x1.95, x2.0, x2.5. Use common
sense...don't
expect a x1.25 tube o last in a x2.5 tyre. Many tube
manfturers now mark tube boxes with 26" x 1.5/1.75/1.95/2.0 or 700 x
22/25/28 to save the bike shops from
having to stock every size
individually.
-
MY LEFT CRANK KEEPS FALLING OFF......I
NEED A NEW NUT: Cranks
are commonly a tapered fit, where the square hollow on the crank fits
the square taper of the Bottom Bracket axle. When a crank starts
to fall off every time you ride the square hollow is stretching and
distorting to the point that it no longer matches the shape of the axle
it mounts to. No amount of tightening or lock-tite or new nuts will
hold this baby on. Its time to send that piece of alloy to the can
recycler and get yourself a new one. Precautionary advice would be to
nip up your cranks once a month. Newer spline style axles and cranks
don't suffer this problem so much.
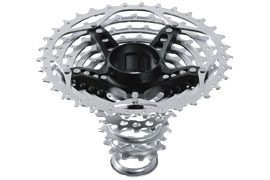
Stainless Steel and Spokes Over
the past couple of years we have had to deal with hundreds of broken
wheels. Unfortunately all these cheaper wheels were factory built with
very poor quality spokes and most started to fail after 1-2 years.
There were a few theories flying around to explain why the stainless
steel spokes were rusting and breaking in the middle of the spoke
shaft. One theory was not enough nickel in the mix. I wonder if its a
case of an over-use of poor grade recycled steel in conjunction with
the nickel theory. Either way, what it all comes down to is if you buy
good quality products from the start you will save yourself a lot of
grief in the future.
I have found these brief explanations on Stainless Steel that might help us understand its properties. 1. What makes stainless steel stainless? Answer:
Stainless steel must contain at least 10.5 % chromium. It is this
element that reacts with the oxygen in the air to form a complex
chrome-oxide surface layer that isinvisible but strong enough to
prevent further oxygen from "staining" (rusting) the surface. Higher
levels of chromium and the addition of other alloying elements such as
nickel and molybdenum enhance this surface layer and improve the
corrosion resistance of the stainless material. 2. What is the difference between 18/8 and 18/10 stainless steel? Answer:
The first number is the amount of chromium that is contained in the
stainless, i.e., 18 is 18% chromium. The second number is the amount of
nickel, i.e., 8 stands
for 8% nickel. So 18/8 means that this stainless
steel contains 18% chromium and 8% nickel. 18/10 is 18% chromium and
10% nickel. The higher the numbers the more
corrosion resistant the
material. 18/0 is a misleading designation. Both 18/8 and 18/10 contain
nickel and are part of the grade family "300 series" stainless. 18/0
means that there is 18% chromium but zero nickel. When there is no
nickel the stainless grade family is the "400 series". 400 series are
not as corrosion resistant as the 300 series and are magnetic, where
the 300 series are non-magnetic. 3. Can stainless steel rust? Why? (I thought stainless did not rust!) Answer:
Stainless does not "rust" as you think of regular steel rusting with a
red oxide on the surface that flakes off. If you see red rust it is
probably due to some iron
particles that have contaminated the surface
of the stainless steel and it is these iron particles that are rusting.
Look at the source of the rusting and see if you can remove
it from the
surface. If the iron is embedded in the surface, you can try a solution
of 10% nitric and 2% hydrofluoric acid at room temperature or slightly
heated. Wash area
well with lots and lots of water after use.
Commercially available "pickling paste" can also be used. Hydraulic Brake Fluid Properties This
topic has always been a hot one, D.O.T. 3 brake fluid versus D.O.T. 4,
versus D.O.T. 5. Which is best? Isn't D.O.T. 5 the hot set-up? Why are
there different
kinds to begin with, and what are the pros and cons of
each? Let's explore all that, and hopefully in the process eliminate
the hype and misinformation that often
surrounds this subject. Air? From Where?
Let's
begin at the beginning. A brake system is not a sealed system. A
physics principle known as Boyle's Law in a round-about way establishes
that a fluid cannot
leavea container unless air can follow it. If the
vent in your gas tank plugs up, for example, fuel will eventually stop
flowing. Similarly, a brake system is, like a fuel tank,
vented to
atmosphere, usually at its highest point, the reservoir. (Ever notice
that little notch?) Thus a brake system has continuous access to air. Rear Suspension Rear
suspension design is forever morphing itself into the latest and
greatest. Here are a handful of original designs that started the ball
rolling. Please remember that every year bike companies change there
designs so some examples given here may not be represented year to year. FOUR BAR LINKAGE...Interrupted seat tube Linkage
bikes can use short travel shocks and still achieve long rear wheel
travel. Depending on design differences it is possible to tune the rate
between rear wheel and shock travel in different stages of the travel
cycle. Some designs have multiple mounts for linkage and shock on the
main frame and for the shock on the linkage bar. This makes the design
very tuneable. Used on both XC and DH bikes. See: Intense, Specialized,
Craftworks, KHS........ CANTILEVER BEAM or Monoshock A
single main pivot rotates the rear triangle, compressing the shock
mounted in the main frame. Its is the simplest way of suspending the
rear wheel. The placement of the main pivot can alter the performance
of the suspension. High pivots extend the the suspension under pedaling
force, low pivots can make the
suspension compress under power. A pivot
placed in line with the middle chain ring will perform the best. See:
Cannondale, KHS, Scott, Yeti FOUR BAR LINKAGE II or Rocker Advantages
to this design is lower centre of gravity and strong mounting position
near BB for shock. See: KHS,Trek, Kona, Giant MACPHERSON STRUTA
very early design where the shock is a structural part of the frame. If
constructed well the suspension can be free from pedallling input, thus
making
it very 'active'. Generally a short travel design. See: AMP,
Norco
UNIFIED REAR TRIANGLE or URT The
rear triangle and BB are one unit, connected to the main frame by one
pivot point. The placement of the pivot in relation to the BB is
crucial to the performance of the bike. The further forward the pivot
the 'less active' the suspension is while standing, the higher the
pivot, the less active it will be while pedalling.
..locking out (fully
compressing) the suspension. |